
Quick Answer: To winterize and protect your septic system in cold climates, insulate tank covers and pipes, install a septic heater or approved heat cable, maintain snow cover on the drain field, and check the system frequently. Proper preparation in fall prevents costly freeze damage, keeps wastewater flowing, and ensures your system works reliably through winter.
- Insulate septic tank covers and exposed pipes before the first freeze
- Use only septic-approved heaters or heat cables for added protection
- Maintain snow or mulch cover over your drain field for ground insulation
- Reduce water use ahead of and during deep winter cold spells
- Monitor system components weekly and after major storms
Table of Contents
Introduction: What You’ll Achieve and Why It Matters
This guide will equip you with actionable steps to winterize and protect your septic system in cold climates—preventing costly damage from freezing temperatures. Expert-backed septic maintenance before winter helps avoid frozen pipes, cracked tanks, and impaired drain fields, ensuring reliable wastewater management until spring thaw.
Advanced plumbing skills aren’t needed, but basic DIY know-how and comfort with outdoor chores help you execute these steps safely. Reserve about 3–5 hours for prep; costs range from $100–$200 for insulation, approved heating cables, and safety gear.
By following this guide, you’ll secure your septic system against winter damage and steer clear of expensive emergency repairs and system failures during the coldest months.
Preparation and Safety
Tools and Materials Checklist
Assemble these items to streamline your septic winterization:
- Insulating blankets or foam septic tank covers
- Pipe insulation sleeves or foam wrap
- Snow rake or roof rake (for snow management)
- Septic system heater or heat cable (specifically rated for septic use)
- Shovel and gloves
- Safety goggles and dust mask
- Warm clothing and waterproof boots
- Flashlight or portable work light
- Tape measure
- Caulk or sealant for cracks
Safety Precautions and Protective Gear
- Wear gloves and waterproof boots to protect from effluent exposure
- Use goggles and a dust mask when working with insulation
- Never enter the septic tank; confined space entry is hazardous
- Work with a partner for added safety
- Be cautious of slippery frost or ice; prioritize stable footing
- Follow all manufacturer instructions for electrical devices and heaters to prevent fire hazards
Workspace Setup and Preparation
- Clear debris, leaves, and old snow from around the septic tank and drain field access points
- Mark lids and critical ports so you can find them after heavy snow
- Ensure good lighting; use headlamps or portable work lights if needed
- Lay down boards for walkways if the ground is unsafe or icy
- Keep tools within easy reach to reduce overreaching on slippery surfaces
Step-by-Step Implementation Guide
| Step | Purpose | Key Actions |
|---|---|---|
| Inspect and Clean Area | Uncover and check all system parts | Remove dirt & snow, inspect for cracks or damage |
| Insulate Tank & Pipes | Reduce heat loss and frost penetration | Wrap pipes, cover lids/risers with insulation specifically rated for septic protection |
| Install Heater or Cable | Provide added freeze protection in severe cold | Apply approved heater/cable per manufacturer guidelines |
| Manage Drain Field Snow Cover | Natural insulation for field soils | Retain snow, use mulch if necessary; clear tank lids/vents after storms |
| Reduce Water Use | Minimize system stress before and during deep freezes | Stagger laundry, repair leaks, avoid heavy flows |
Step 1: Inspect and Clean the Septic System Area
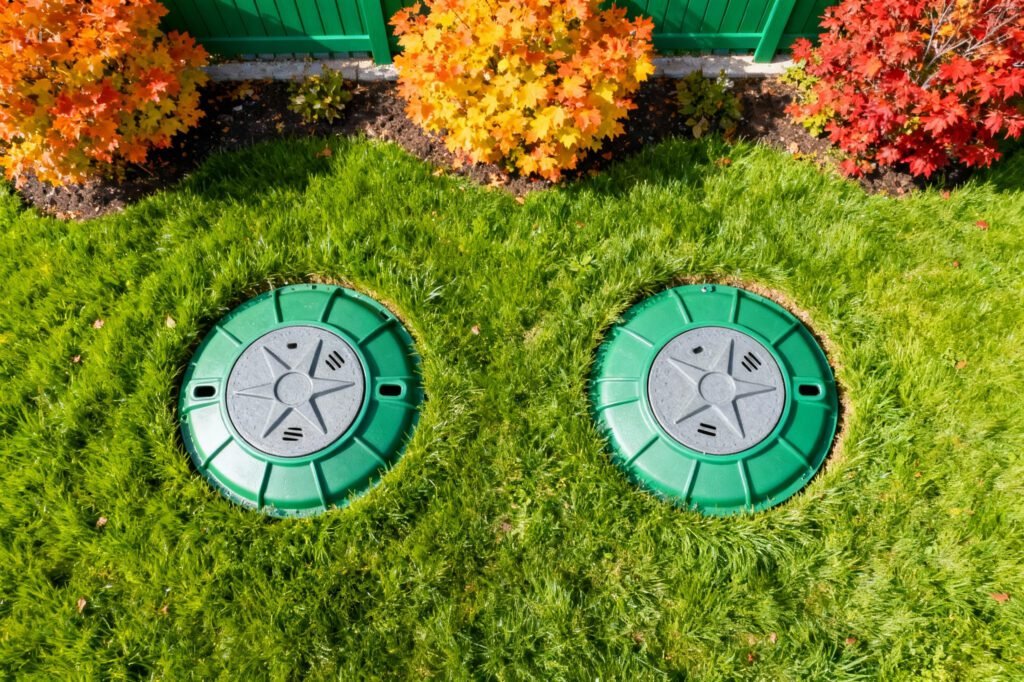
Remove all leaves, debris, and snow from septic tank lids and ports. Check covers and risers for cracks or damage, and clear the area for good air flow and easy insulation application.
Step 2: Apply Insulation to the Septic Tank and Piping
Wrap exposed inlet and outlet pipes with foam sleeves or pipe insulation tape. Install insulating blankets or rigid foam covers over all tank lids and risers to minimize heat loss.
Step 3: Install a Septic System Heater or Heat Cable
Where winter regularly drops below 20°F (-6°C), fit a septic system heater or heat cable around the tank and vulnerable pipes. Use only septic-approved devices for safety and effectiveness. Follow EPA recommendations and manufacturer instructions.
Step 4: Manage Snow Cover Over the Drain Field
Preserve snow cover on your drain field—it acts as an essential insulator. Spread straw or mulch to protect soil warmth during thin snow periods. After heavy snow, clear excess from septic lids/vents with a snow rake, but leave the drain field’s cover intact for insulation.
Step 5: Reduce Water Usage Before Deep Freezes
Reduce water flow through your septic system several weeks before deep cold snaps. Avoid back-to-back laundry or dishwasher loads, and promptly fix leaks. This reduces freezing risk and allows beneficial bacteria to stay active.
Quality Control and Testing
How to Verify Success
- Check insulation weekly to ensure full coverage and secure placement
- Confirm septic heater/cable operation and thermostat settings
- Look for signs of freezing, like sluggish water flow or ice build-up, especially after cold nights
- Monitor for odd odors and visible leaks
Testing Procedures and Metrics
- Use a thermometer to keep insulation and tank cover temps above 32°F (0°C)
- Visually inspect external drains for ice or blockages
- Check all electrical connections for the heater; fix any issues immediately
- Track water usage and watch for odor/backups as early warning signs
Troubleshooting Common Installation Issues
| Issue | Cause | Fix |
|---|---|---|
| Insulation shifts/loosens | Poor securing | Use zip ties or all-weather tape to reattach |
| Heater malfunctions | Defective parts or power loss | Check power supply, replace damaged components |
| Persistent pipe ice | Insufficient insulation or heating | Add more insulation, consider additional heat cable |
| Cracks or leaks appear | Weather stress, aging parts | Seal with industrial caulk or schedule professional repairs |
Maintenance and Long-Term Care
Daily/Weekly Maintenance Tasks
- Inspect exposed pipes and covers for movement or damage after storms
- Test septic heater and battery backup systems weekly
- Remove debris from lids and vent pipes regularly
Monthly/Quarterly Checks
- Inspect pipe insulation and replace worn sections
- Check heater cords and thermostats for wear or frost
- Arrange for routine septic tank pumping (see our full guide)
Signs of Wear and When to Replace
- Cracks in tank lids or risers, letting cold air in
- Damaged or degraded insulation requiring replacement
- Repeat freezing even with heaters indicates aging system
- Persistent odors, backups, or drainage issues—potential drain field or tank failure
Pro Tips and Advanced Techniques
Efficiency Hacks from Professionals
- Add reflective insulation below foam covers to boost retained heat
- Use a programmable thermostat on your septic heater for energy efficiency
- Divert roof/sump run-off away from the drain field to prevent freeze-damage by over-saturation
Tools and Accessories Worth Investing In
- Infrared thermometer for quick spot checks on cover temperatures
- Premium weatherproof insulation tape for secure application
- Battery backup power supplies for heater operation during outages
Customization and Adaptation Options
- Strategic snow fencing upwind of the drain field helps maintain natural snow insulation
- Raised septic tank covers with built-in insulation cavities ease maintenance and provide better freeze protection
- Remote temperature sensors integrated with smart systems for instant alerts
Frequently Asked Questions
How do I know if my septic system is freezing?
Signs of septic freezing include slow drains, foul odors around the system, ice formation on exposed pipes, and water pooling near the drain field. Early identification allows for immediate preventive action.
Can I use any heater for my septic system in winter?
No. Use only heaters and heat cables rated and tested for septic system use. Generic heaters can damage components or pose fire risks. Adhere to all manufacturer and EPA safety guidelines.
How important is snow cover for septic system protection?
Very important—snow acts as natural insulation, limiting frost depth in the drain field. Maintain consistent snow cover, or supplement with straw/mulch during winters with little snowfall.
Should I continue to use my septic system normally during winter?
It’s best to reduce water use, especially before and during extreme cold, to minimize freezing risk. Avoid heavy use such as consecutive laundry loads, and repair leaks immediately.
How often should I have my septic system inspected before winter?
Schedule a professional inspection every 1–2 years, ideally in early fall before the first deep freeze. Licensed inspectors can identify vulnerabilities and recommend tailored winterization steps.
What are the most common septic system winter problems?
Pipe freezing, cracked lids, blocked or frozen vents, and oversaturated drain fields that freeze are the main risks. Proactive winterizing minimizes these threats.
Can insulation alone prevent septic system freezing?
Insulation is vital, but in harsh climates, it’s not enough. Combine insulation with an approved septic heater and maintain adequate snow/mulch for comprehensive protection.
When should I replace my septic system heater?
Replace if it fails to maintain temperatures, has damaged wiring, or is worn after several seasons. Annual checks help prevent midwinter breakdowns.
Further Reading & Resources
- Seasonal Home Maintenance Checklist for Northern Climates
- How to Inspect and Repair Septic Tank Lids
- Preventing Frozen Pipes: Plumbing Tips for Winter
- Guide to Septic Tank Pumping and Cleaning
- Emergency Repairs for Septic System Failures
- U.S. Environmental Protection Agency: Septic Systems Guide
- National Environmental Services Center: Winterizing Septic Systems
- Professional Pumpers and Haulers Association: Septic System Heater Safety Tips
Don’t let winter freeze your system! Act now: Follow these fall protection steps before the first hard frost to keep your septic system healthy and operational all winter. For troubleshooting or annual inspections, contact a certified septic professional for advice tailored to your property.
Leave a Reply