Quick Answer: To install a septic system in wet areas or land with high water tables, use a mound system or engineered solutions that elevate the absorption field above seasonal groundwater. Steps include site-specific soil testing, mound construction with sand and gravel layers, installation of perforated pipes and distribution boxes, and strict compliance with local and EPA regulations. Always wear protective gear and consult licensed professionals to ensure safety and regulatory approval.
- Choosing the correct system prevents groundwater contamination and system failures in wet areas.
- Mound septic systems elevate effluent above saturated soils for safe treatment.
- Preparation includes soil testing, safety setup, and complying with local codes.
- Installation requires grading, specialized filter beds, and careful pipe placement.
- Regular maintenance ensures long-term performance and durability.
Table of Contents
Are you dealing with a soggy landscape or high water table? The stakes are high—choosing the right septic system can protect your property and prevent costly, hazardous failures. This comprehensive guide details industry-approved solutions for installing and maintaining mound and advanced septic systems in wet areas, outlining every step from safety preparation to long-term care. Armed with this knowledge, homeowners and professionals alike can tackle challenging groundwater conditions with confidence and compliance.
Prepare Your Site and Prioritize Safety
Gather Essential Tools and Materials
- Excavator or backhoe (grading/mound formation)
- Soil compactor
- High-quality septic tank and distribution box
- Washed sand, uniform gravel, and clean topsoil
- Perforated drain pipes and filter fabric
- Level, measuring tape, and slope tools
- Protective gloves, waterproof boots, and work clothing
- Safety cones/signs for marking work area
- Water testing kits (for baseline groundwater data)
Follow Safety Protocols and Wear Proper Gear
- Always wear waterproof gloves and boots to reduce exposure to wastewater and soil pathogens.
- Use eye protection and ensure all machinery is maintained per manufacturer recommendations.
- Communicate clearly with all site workers and establish an emergency contact plan.
- Monitor for unstable ground or sudden changes in site conditions; have a first aid kit accessible.
Establish a Safe, Compliant Workspace
- Lay out the system site per design specifications and recent soil/water table tests.
- Clear vegetation and debris, and mark safety perimeters with cones and caution tape.
- Confirm drainage will not channel surface runoff toward the future mound.
- Double-check setbacks from wells, water bodies, and property lines—as mandated by local health departments and the EPA.
Implement Your Mound or Advanced Septic System: Step-by-Step
Step 1: Evaluate Soil and Water Table Conditions
- Perform percolation testing and document the seasonal high water table, preferably during wet season per local health code (NSFC Guidance).
- Record soil composition, absorption rate, and compaction needs to finalize system design and ensure proper elevation.
Step 2: Excavate, Grade, and Prepare the Mound Base
- Use an excavator to clear and level the chosen location—ensuring a flat, firm base for even soil distribution.
- Shape the mound base to promote controlled drainage and prevent surface water ponding.
Step 3: Build the Engineered Sand and Gravel Filter Bed
- Lay filter fabric across the base to separate underlying soil from fill materials.
- Spread uniform, washed gravel, then top with a thick layer of washed sand (meeting or exceeding NSF/ANSI 40 or state septic sand standards).
- Ensure depth and gradation match engineered drawings to maximize treatment and maintain unsaturated flow.
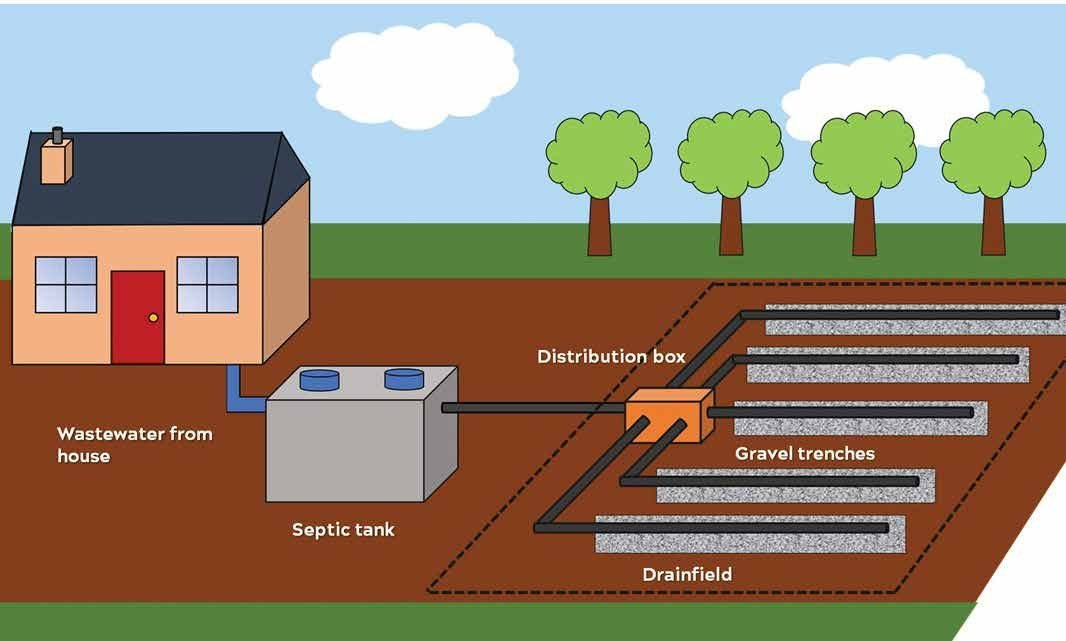
Step 4: Install the Perforated Drainage Pipes and Distribution System
| Component | Purpose | Specification |
|---|---|---|
| Perforated Drain Pipes | Distributes effluent evenly across mound | PVC, 4-inch diameter, slotted, set with correct slope (1-2%) |
| Distribution Box | Directs flow to multiple drain lines | Level, sealed connections |
| Septic Tank Outlet | Feeds effluent into system | Structural integrity verified |
- Lay pipes per design, ensuring even spacing and correct slope for gravity flow.
- Connect securely to the distribution box, sealing all joints to prevent leaks and potential groundwater contamination.
Step 5: Cover the System and Establish Vegetation
- Backfill with clean topsoil, contouring the mound to manage runoff and blend with the landscape.
- Seed or sod with hardy grasses that tolerate wet soils and provide surface stabilization.
- Establish buffer zones—never allow vehicles or heavy equipment on the finished mound.
Ensure Your System Works Right
Inspections & Alignment Checks
- Inspect for proper component placement, correct pipe slopes, secure connections, and absence of standing water above the mound.
- Verify elevations ensure effluent disperses above the seasonal high water table.
Test System Functionality and Safety
- Perform a post-installation percolation test and check infiltration rates against design standards.
- Use dye or smoke tests to detect leaks or improper flows (EPA Onsite Wastewater Treatment Recommendations, 2022).
- Monitor effluent level in the distribution box and downstream groundwater quality.
Solve Common Installation Issues
- Ponding water: Check for clogged pipes or poor slope; clear obstructions and correct grading.
- Uneven settling: Add soil and re-compact where necessary.
- Odors or sewage surfacing: Inspect for blocked system elements or tank issues; consult a professional if persistent.
Maintain and Monitor Your Septic System
Routine Maintenance Tasks
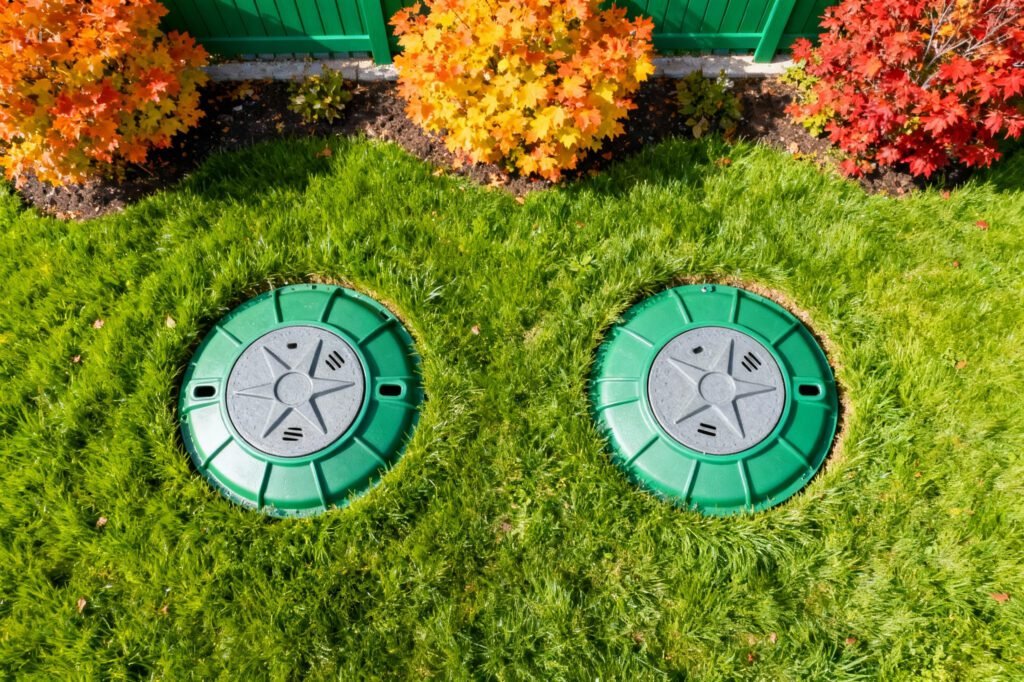
- Visually inspect access lids and the mound weekly for signs of damage or odor.
- Keep drainage gutters/ditches clear and avoid placing weight on the mound.
Monthly and Quarterly Checks
- Monitor vegetation—reseeding worn spots as needed.
- Test groundwater downstream for any elevated contamination indicators.
- Pump the septic tank every 3-5 years based on household usage and size (NC State Extension Guidance).
Identify Signs of System Aging or Failure
- Watch for persistent soggy soils, odors, or sewage surfacing—these demand immediate professional inspection.
- Structural failures (cracks, pipe settlement) require evaluation by a licensed engineer.
- Replace systems when repeated repairs no longer resolve issues or code compliance lapses.
Enhance System Performance: Advanced Pro Tips
Boost Efficiency with Smart Additions
- Install flow equalization devices to better regulate effluent dispersal.
- Choose native grasses with deep root networks to increase stability and water uptake.
- Schedule tank pumping during periods of lowest groundwater to reduce installation impacts.
Recommended Tools and Upgrades
- Water-resistant inspection cameras for routine pipe checks
- Advanced soil moisture meters for ongoing mound monitoring
- Portable compactors designed for tight or sensitive sites
Customize for Extreme Wet Conditions
- Integrate polystyrene foam under filter beds to reduce mound height where space is limited.
- Install aerobic treatment units ahead of the mound to significantly improve wastewater treatment.
- For unique hydrogeology, work with a licensed engineer or hydrogeologist to adapt plans to your site’s groundwater profile and compliance needs.
Frequently Asked Questions
What is a septic system for wet areas, and how does it differ from standard systems?
A septic system for wet areas is engineered to keep treated effluent above the seasonal high water table, using raised features like mounds or sand filters, unlike traditional systems that rely on the surrounding natural soil for absorption. This prevents groundwater contamination and ensures reliable treatment even when soils are saturated. (Source: EPA Onsite Wastewater Treatment Guidance, 2022)
How does a mound septic system work to treat wastewater?
Effluent is pumped from the tank into a constructed sand and gravel mound. Aerobic bacteria in the sand layer treat the wastewater as it filters through, with cleaned water eventually dispersing into unsaturated native soil below, staying well above any saturated ground or shallow groundwater.
Are there septic system options for ponds or extremely soggy land?
Yes, besides mound systems, options include aerobic treatment units, drip irrigation fields, and constructed wetlands. The best choice depends on site-specific soil, space, and regulation requirements.
What causes septic system failures in wet areas?
Common causes include direct saturation of drainfields, poor percolation, hydraulic overload, clogged pipes, or improper installation that allows wastewater to surface or leak into groundwater. Addressing high water table levels during planning and installation is critical to system success.
How should I maintain a mound septic system for optimal performance?
Maintain vegetative cover, keep the surface free from traffic or compaction, inspect routinely for erosion or settling, and pump the tank every 3-5 years. Also, monitor for unusual odors or water pooling, and avoid chemicals or excessive water use.
When is professional engineering help required?
Seek professional input at the initial soil evaluation, during system planning in high-risk areas, and whenever repairs, upgrades, or compliance questions arise. Licensed engineers ensure your system meets EPA and local requirements.
Can a homeowner install a mound system themselves?
Homeowners with the right skills and access to heavy equipment may be able to perform installation tasks; however, due to complexity, permitting, and safety requirements, most codes require oversight or installation by licensed septic professionals.
How do local regulations impact septic system selection in wet areas?
Local codes dictate acceptable designs, required setbacks, and permitting. Always confirm system design and location comply with local health department and environmental agency rules prior to installation to prevent future violations or costly redesigns.
Related Resources
- Understanding Soil Percolation Tests for Septic Systems
- Septic Tank Maintenance: Best Practices for Homeowners
- Advanced Drainfield Designs for Challenging Sites
- How to Choose the Right Septic System for Your Property
- Groundwater and Septic Systems: Protecting Your Water Supply
External Resources
- U.S. Environmental Protection Agency (EPA) — Onsite Wastewater Treatment Systems
- National Small Flows Clearinghouse — Septic Systems in Wetlands and Wet Areas
- Onsite Sewage Treatment Program, North Carolina State University
Key Takeaways:
- Proper planning, soil testing, and professional input are fundamental for septic system success in wet areas.
- Mound and advanced engineered systems safely elevate effluent, protecting your property and environment from contamination.
- Ongoing maintenance and monitoring, combined with local code compliance, ensure your investment lasts and performs optimally.
- Always consult with your local health department for site-specific rules before beginning any installation.
Ready to safeguard your property in a wet area? Consult your local health department and EPA guidelines—then use our step-by-step guide and recommended resources to design and maintain a septic system built for the toughest conditions!
Leave a Reply